Choosing the Right Fly Rod Weight
By: Montana Casting Co.
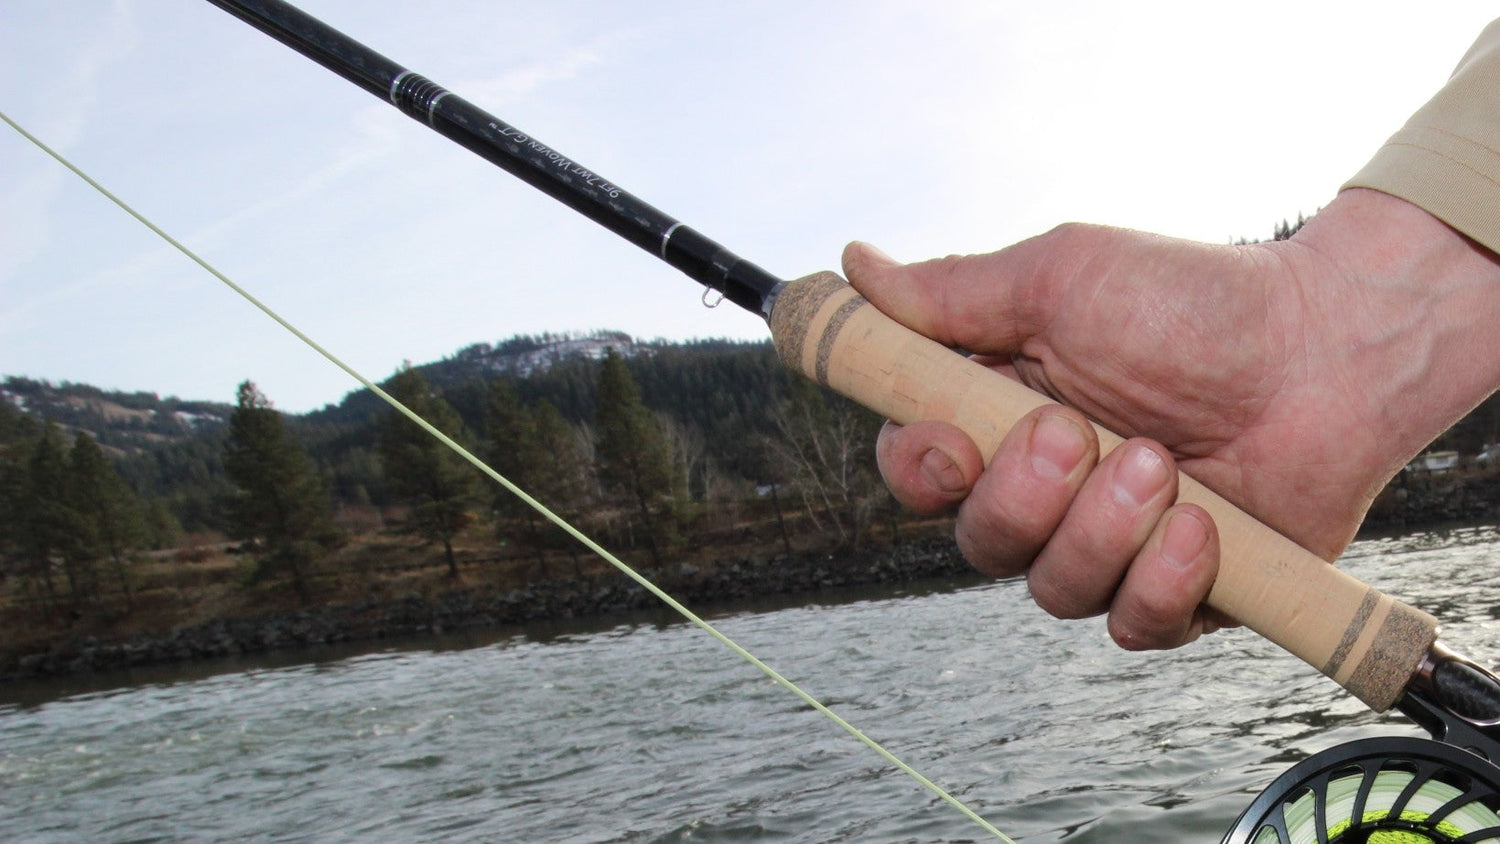
What is Fly Rod Weight?
At its simplest, fly rod weight is an indicator of a blank's stiffness: the higher the “weight”, the stiffer the blank. Typically, you will match a fly rod’s weight to the corresponding weight in fly line. A 4wt fly rod with a 4wt line, a 5wt rod with a 5wt line, and so on. (That said, there are some instances where you may want to overline your rod with a heavier fly line—such as pairing a 6wt line with a fast-action 5wt to fully load your rod on shorter casts.)
Fly rod weight is also a general indicator of the fly rod’s action and backbone. A lower weight will have a lighter action and less backbone, ideal for lighter flies and smaller fish. Conversely, a higher weight makes for a heavier action and the ability to handle larger flies and fish.
Fishing with a 9 ft 7wt Warm Springs Fly Rod
What size of a fly rod is right for you?
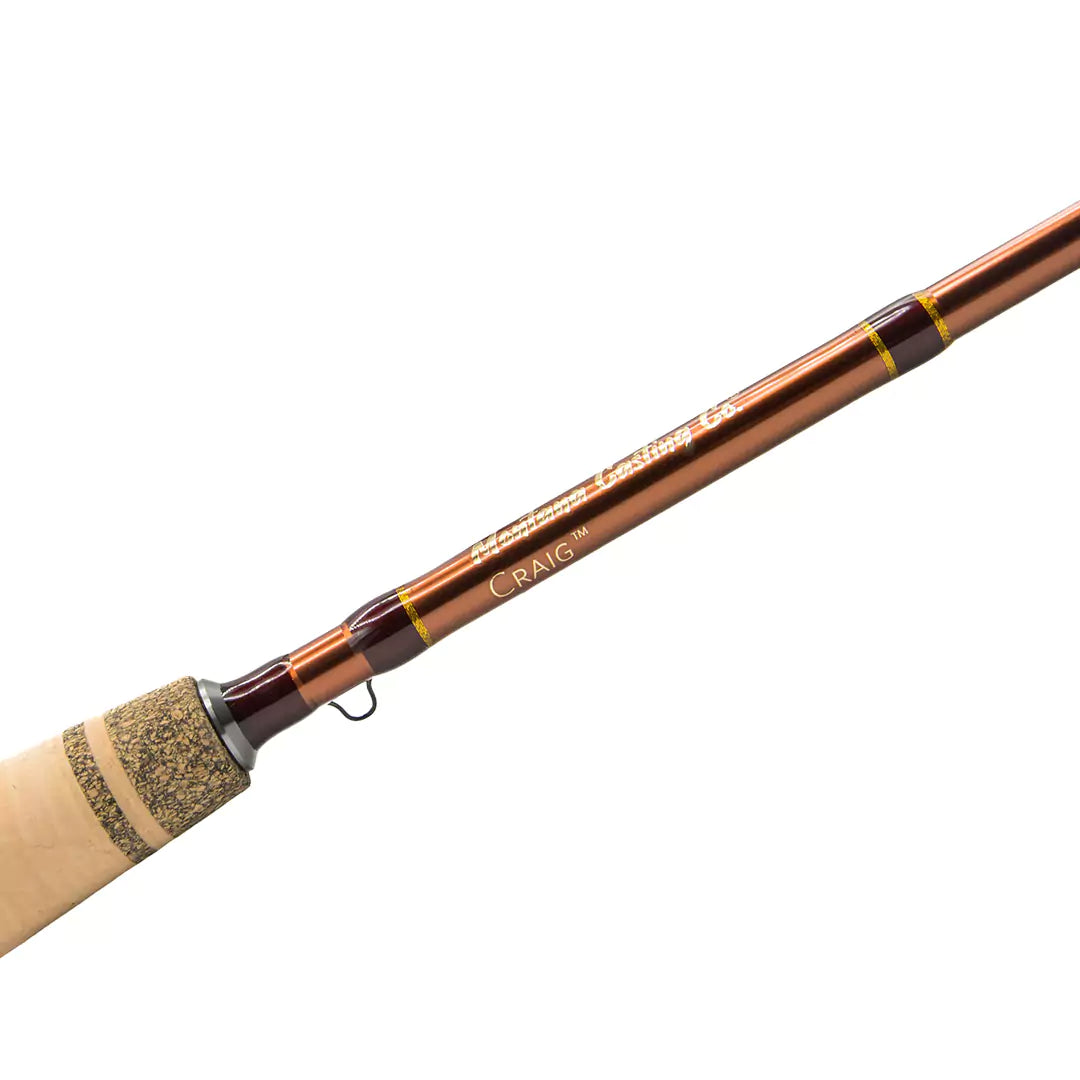
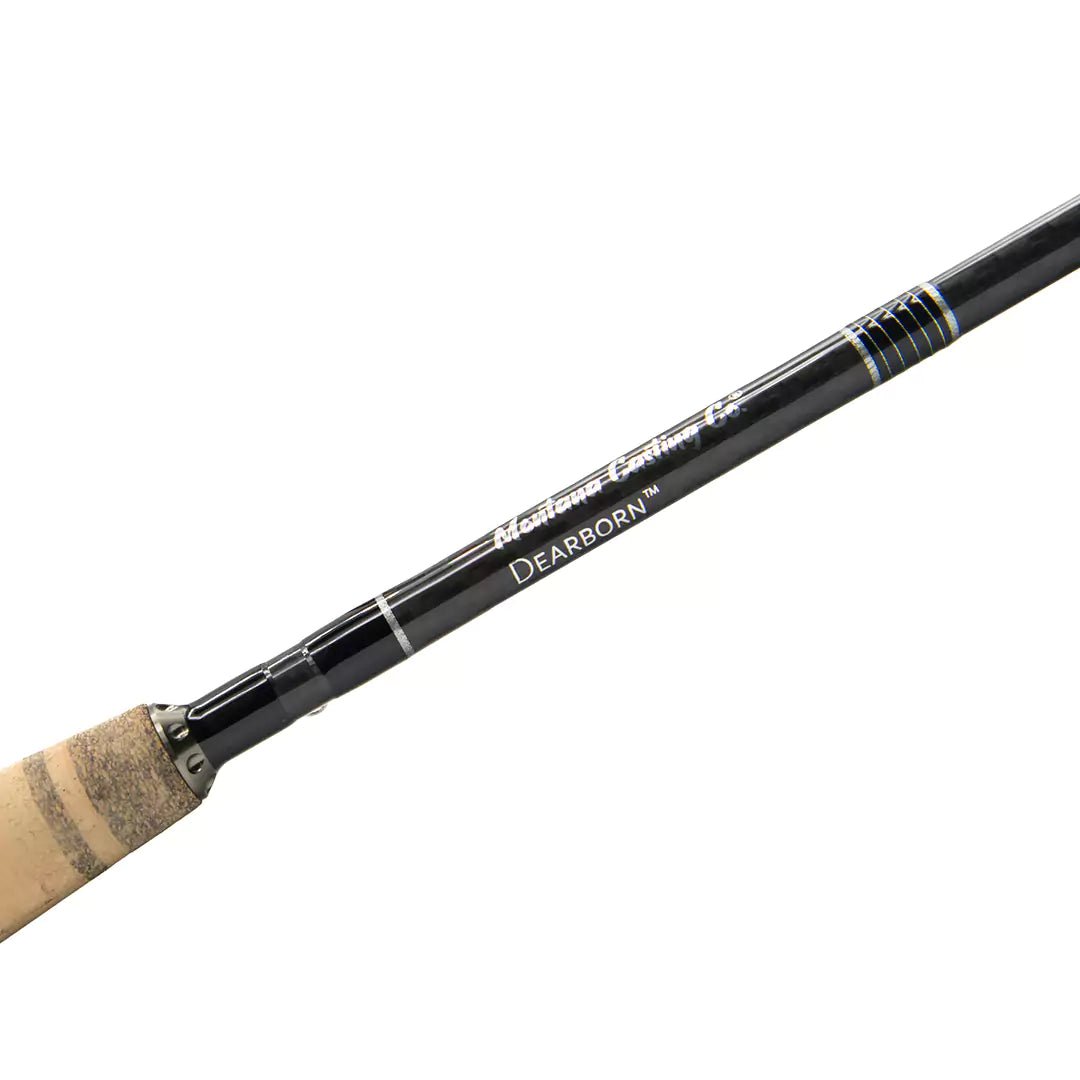
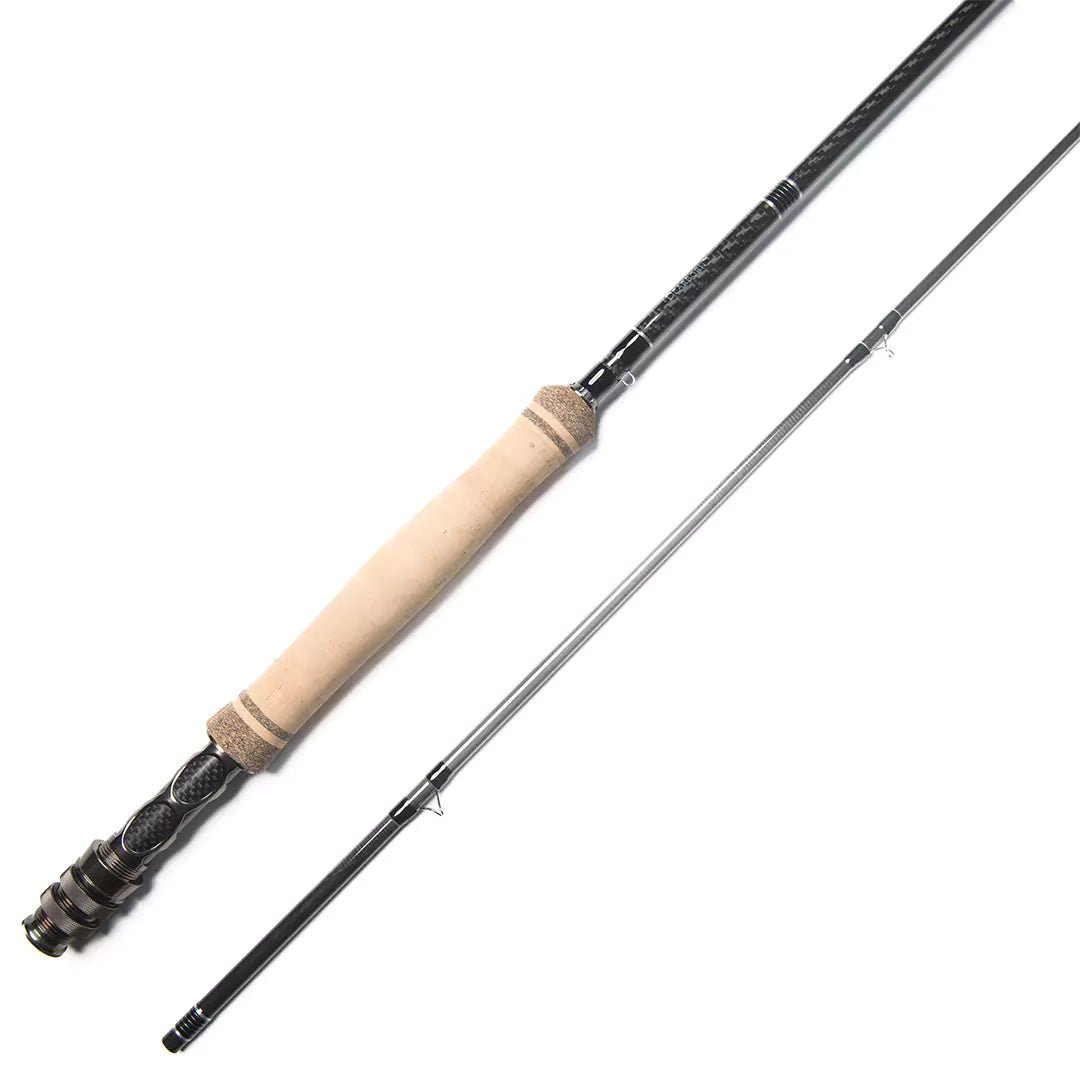
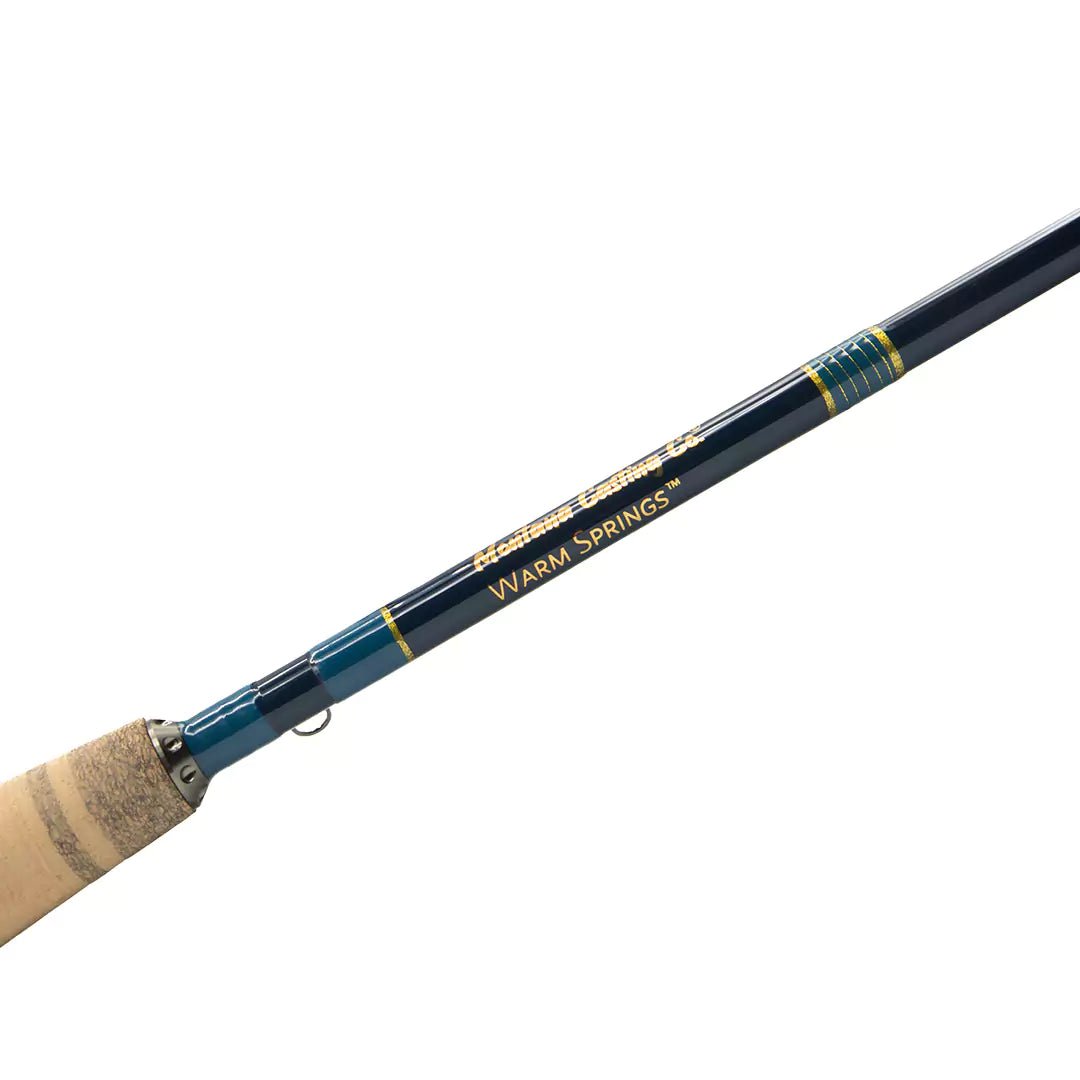
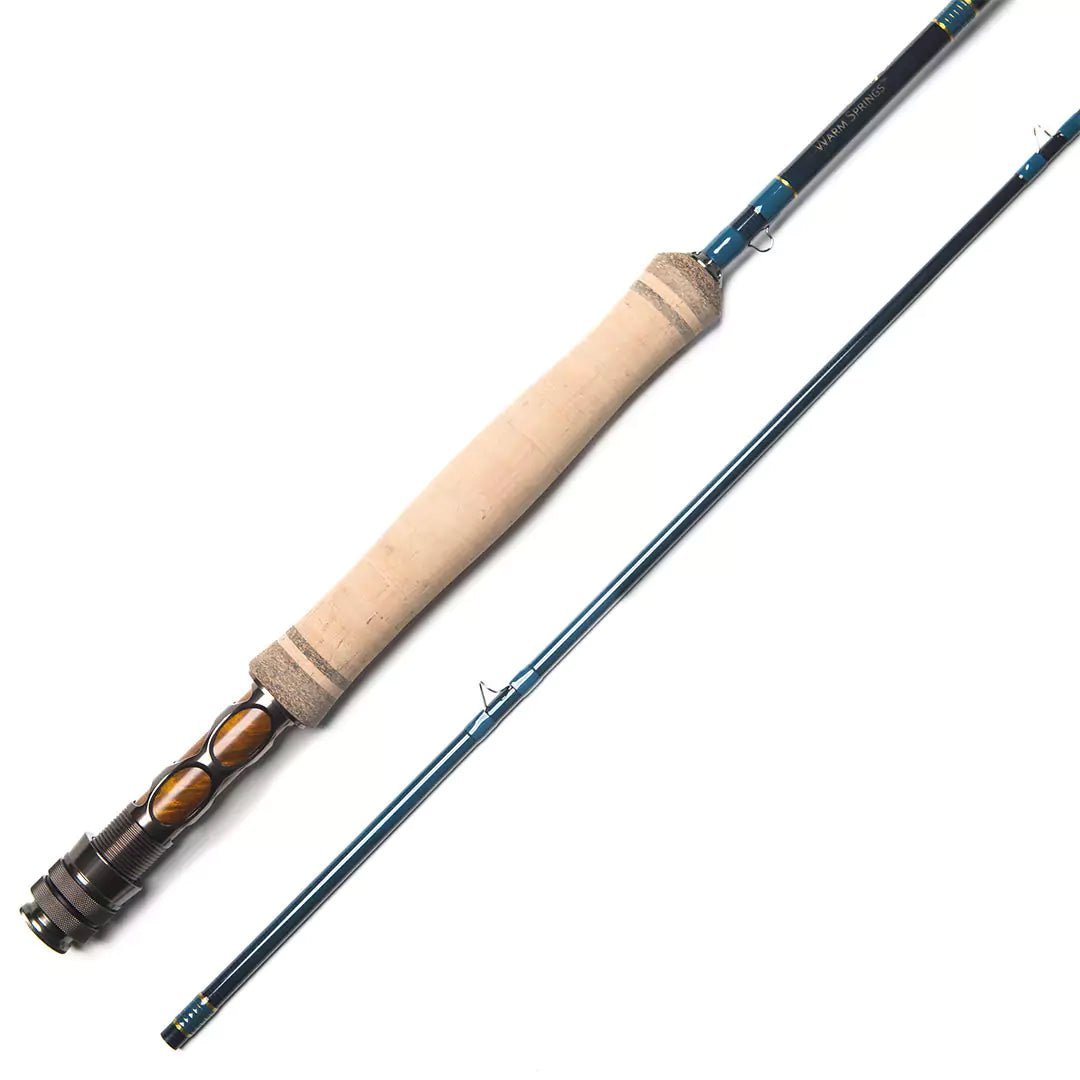
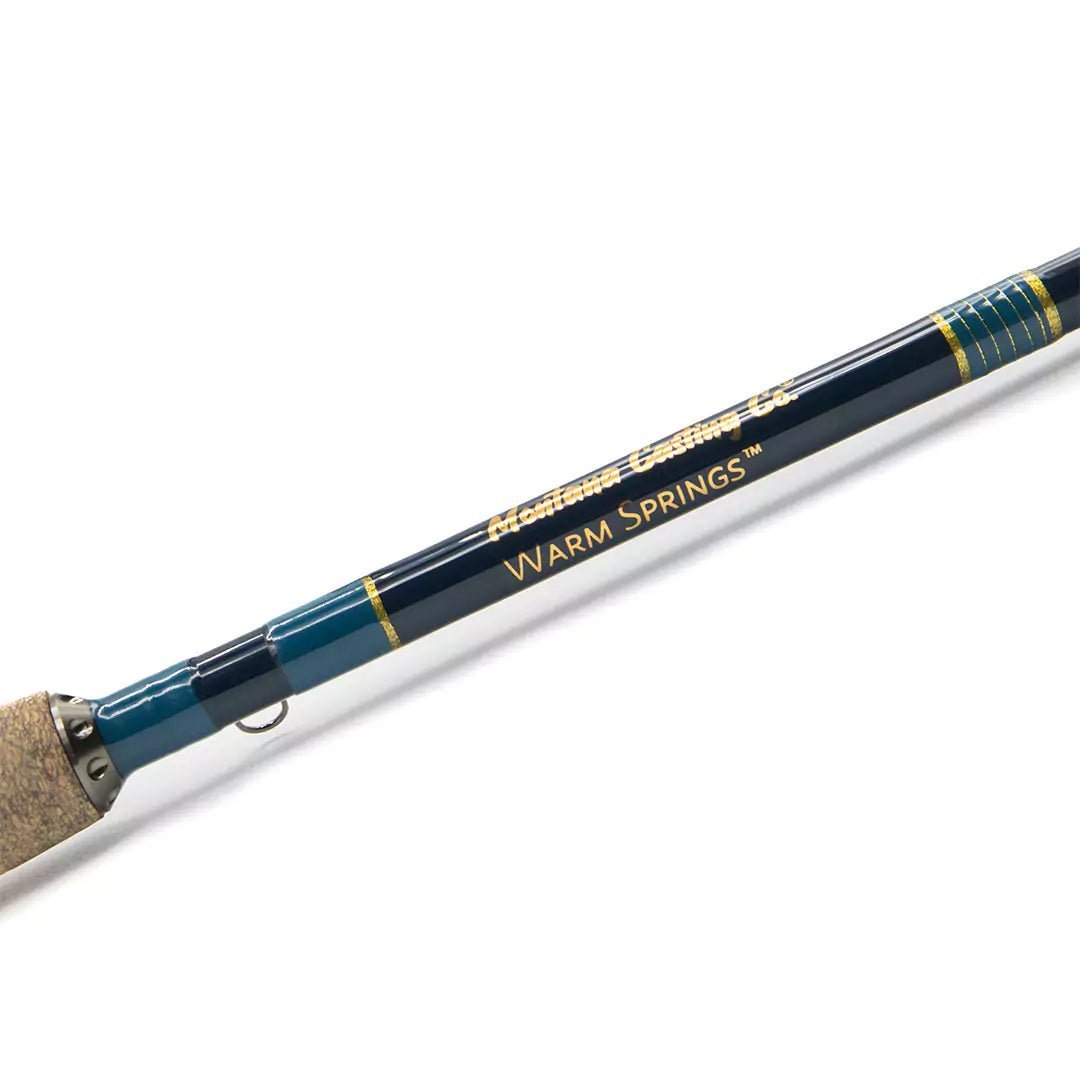
Fly rods are designed to fit specific fishing conditions. For example, we might take a 4wt Craig—a smooth, medium-action fly rod—on a weekend of creek fishing in the mountains. On an upcoming saltwater adventure, however, we’d be looking at a 9wt rod with a fast action to handle larger flies, windy conditions, and monster fish. When selecting a rod weight, think about the species you’re targeting and the conditions you’ll need to cast in.
4wt – These fly rods are very light in the hand, perfect for shorter casts and smaller fish like brook trout. That said, don’t doubt the power of a 4wt. These light fly rods are perfectly capable of taking on a 5lb brown trout with a bad attitude!
5wt – Still quite light in the hand, these mid-range rods work well on smaller water (similar to a 4wt) but carry a bit more backbone. It’s one of the most commonly used weights in trout fishing, likely for its ability to handle most trout from small juveniles to solid eight-pounders.
6wt – This rod is comparable to a 5wt, but it is specifically designed for larger water and fish in the 7 to 12lb class. Don’t be afraid to use a 6wt fly rod for smaller saltwater fly fishing excursions. They work well for long fly casting on open water and can also be a great streamer rod.
7wt – This is where you start to get into the big boys. 7wt fly rods generally come with a fighting butt to handle hard-fighting fish like steelhead. It’s a great choice for saltwater adventures or big, Pyramid Lake Cutthroats. This is the most commonly used size for streamer fishing. Add an extended fighting butt, and a 7wt becomes a lethal weapon!
8wt – 8wt fly rods are most commonly used for big fish on big water. We use this powerful fly rod for pike fishing, as pike are known to crush your streamer and go head-first into the weeds. You’ll be glad you have the extra power to pull them out of Neptune's quagmire while mumbling a few choice words!
9wt – Nothing says big dog like a 9wt fly rod! 9wt fly rods are frequent companions for fly fishermen heading to the Florida Keys, Costa Rica, or other tropical locations in pursuit of bonefish, permit, or tarpon. These rods have the backbone for fighting monsters and the action for long casts on open water. If you’re looking at purchasing a 9wt, big water adventures are in the cards!
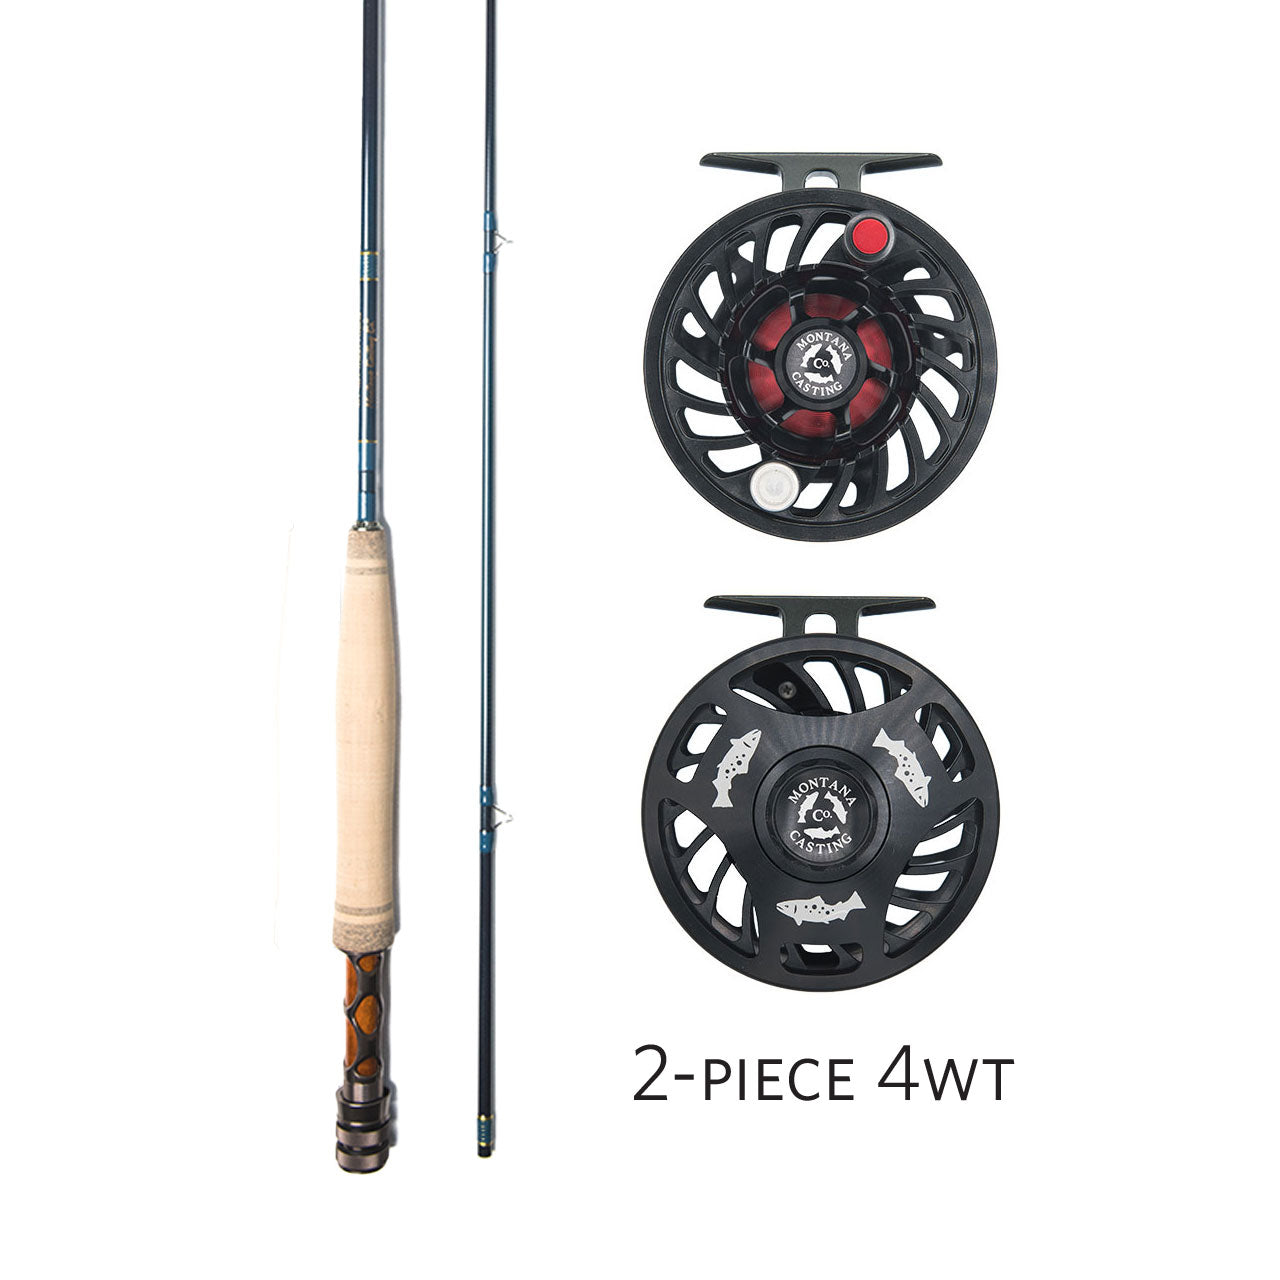
Every Montana Casting Co. fly rod is available in a 4wt through 9wt. Our 7wt, 8wt, and 9wt rods come with a removable fighting butt that can be replaced with a longer custom build fighting butt from 4 to 5 inches in length. This allows you to cast your rod Spey style or give it a switch rod feel.
Questions, comments, upcoming fly fishing adventures? Share them in the comments below!
Example of standard and extended removable fighting butts.
Some Products Featured in this Article
-
Craig Fly Rod 4 Piece
$575.00 -
Dearborn Fly Rod
$650.00
2 & 4 Piece -
Warm Springs Fly Rod 2 & 4 Piece
$750.00
Recommended Reading
-
Our fly line series so far...
If you’ve kept up with the previous two posts on fly lines, then you’ve slogged through a lot of information on fly line weight, taper, and general physics. Congratulations! You’ve graduated. I hope we’ve managed to beat back some of the mystery surrounding modern fly line specifications. At the very least, you’ve got a few facts in your back pocket to school your buddies with on the river.
If you haven’t kept up, no worries. Regardless of your familiarity with the Common Cents System (see Part 1) or the parts of a taper (see Part 2), Part 3 is meant to be a quick, user-friendly guide to Montana Casting Co. fly lines. Which line is best for you? Read on and find out.
The lowdown on Montana Casting Co. fly lines:
Montana Casting Company is rooted in the traditions of custom rod building. When we decided to expand from those roots, we decided to design our rods, reels, and fly lines in tandem so that each component could maximize the performance of the other. With a selection of three different fly lines in our store, you’re free to customize your line to fit your rod and the environment you plan to fish in.
Just to be clear, our fly rods can be used with any brand of fly line. If you have a tried-and-true brand that you fall back on, use it. Our rods will cast it with ease and accuracy. That said, we’ve put a considerable amount of thought into designing three fly lines that we believe will maximize the performance of your fly rod and we encourage you to give them a try. Here’s a simple rundown of what to look for when choosing a Montana Casting Co. fly line.
What do the names of MCCo. fly lines tell you?
You can choose between the MC-30, MC-38, and MC-40 fly line. Your first hint at the difference between these lines is in the name. MC-30, for instance, indicates that the tapered head of the fly line is in the first 30 feet. Additionally, there will be a number following the name of the general model to specify line weight; MC-306 refers to a 6 wt MC-30 line. As stated earlier, you’ll generally want to match the line weight to the weight of your fly rod.
When should I use the MC-30 fly line?
The tapered head of this fly line is in the first 30 feet, making this an aggressive weight-forward line. If your current fly rod is fast action and you're having trouble loading the rod, try this line; you’ll really feel the difference. This is also a great line for times when you’ll be consistently making short casts of 30 feet or less. It’s a blast to cast!
MC-30 Fly Line SpecificationsWhen should I use the MC-38 fly line?
The tapered head of this fly line is in the first 38 feet. That extra 8 ft adds 30 grain to your standard fly line and serves as a happy medium between more aggressive weight forward lines and lengthier tapers meant for long casts. This is a great line for your day-in and day-out fishing trips, and it will work in any condition. (It pairs especially well with the smooth, medium action of the Craig Fly Rod!)
MC-38 Fly Line SpecificationsWhen should I use the MC-40 fly line?
The tapered head of this fly line is in the first 40 feet. This line fits the AFFTA standards, meaning that it is a standard taper line. Though it works well in all conditions, this line is perfect for long casts with dries to a skittish hog brown or the like. Gentle presentations are key, and the MC-40 is the right fly line for the job.
MC-40 Fly Line SpecificationsGet out of the weeds and get fishing!
The question of which fly line is right for you can be a complicated one to answer. We’ve mercilessly dissected many fly lines over the years in the name of science… As a result, we’ve gotten our fly rods and fly lines to be exactly what we want them to be. That said, fly fishing is a sport of continuous learning and growth. So get out there, have fun, and experiment!
Have questions? Want to talk shop? We’re always happy to chat. Leave a comment below, send us an email at gethookedup@montanacastingco.com, or give us a call at 406-285-1452. Happy fishing!
Let’s Get into the Weeds: Fly Lines Part 3
-
Digging into Fly Line Taper
In Fly Lines Part 1, we looked at how a rod’s optimal line weight is determined using the Common Cents System as well as how additional factors (such as target species, weather conditions, and casting ability) might influence which line weight is right for you. This week’s post is all about taper. What is it? How does it vary across fly lines? Why do we care? Let’s jump back into the weeds!
What is taper?
In generic terms, taper refers to the shape of a fly line. Fly line shape (or diameter) usually varies throughout the length of the line. There are a few key components to a fly lines’ taper: the belly (where most of the mass is located), the front taper (the transition between the tip of the line and the belly), and the rear taper (the transition from the belly of the line to the running line). Varying the length and diameter of these different components allows for the creation of specialized fly lines.
Nowadays, there are several types of tapered fly lines, including weight-forward, double taper, shooting taper, and level line. Weight-forward fly lines are arguably the most popular, but we’ll also touch briefly on double taper lines.
What is a double taper fly line?
Double taper lines have a belly section that takes up most of the length of the fly line. The front and rear tapers are uniform in length and profile, and the middle of the taper is the exact center of the fly line. The idea behind this was to make your fly line last longer; once you wear out one side of the fly line, you can flip the line and use the back half just like a new fly line. Though they lack the direct power of weight forward lines, their longer, thinner tip section makes them ideal for delicate, dry fly presentations.
What is a weight forward fly line?
All Montana Casting Co. fly lines are designed with weight-forward tapers. As the name suggests, weight-forward lines are designed to carry most of the mass in the head of the line. A shorter, heavier belly pulls the comparatively light “running line” (or uniform, non-tapered section) forward. This makes it easier to shoot line over long distances, through windy conditions, or with a heavier, more air-resistant fly.
When you’re shopping around for a weight forward fly line, you’ll find differences in the lengths of the front and rear tapers as well as the belly sections. These factors influence the accuracy, presentation, line control, and the overall aggressiveness of the line. Choosing the right weight forward line is often a matter of determining what balance of these features is best for the conditions you’ll be fishing in.
For example, you might be fishing a fast-action fly rod on small rivers or creeks. You’re making short casts—30 feet or less. A shorter, more aggressive, weight-forward tapper will allow you to feel the rod load.
If you’re fishing a buttery-smooth, medium action and you’re float-tubing on a lake, you’ll want a longer tapered head to allow for longer casts and to help prevent your line from slapping the water behind you.
Or maybe you’re fishing with Montana Casting Co.’s “Old Blue” (the Warm Springs) and you’re looking to use it on everything from gurgling mountain creeks to big rivers and wide-open lakes. If you have a favorite rod, you’ll want to bring it everywhere—and that means you’ll want a medium taper line that can handle a variety of situations.
How can you tell what the tapper of the fly line you're looking at is?
Most modern fly lines have specifications online or on the packaging that inform you how long the tapper is and the weight in grains of the first 30 feet of the fly line (minus the level line). You might also see abbreviations (such as WF for weight forward lines) that tell you more about the lines. Here’s an example of what you will find on the packaging of a Montana Casting Co. fly line:
The final post in our three-part series on fly lines will cover Montana Casting Co. fly lines. We’ll talk design process, key differences, and how to decide which MCCo. line is right for your upcoming fly fishing adventures.
Disclaimer: Yes, we’ve mercilessly dissected and weighed many fly lines over the years to get our fly rods and fly lines to be exactly what we want them to be. I know it's terrible, but it was done in the name of science!
We’d love to answer any of your fly fishing related questions! Leave a comment below, send us an email at gethookedup@montanacastingco.com, or give us a call at 406-285-1452. Happy fishing!
Let’s Get Into the Weeds: Fly Lines Part 2
-
Rigging Your New Fly Fishing Rod & Reel
The big day is here; you finally have your new dream fly rod and reel in hand. The excitement is almost too much to handle! You're daydreaming about the river, campfires, sharing stories with friends, and, of course, fish—BIG FISH. If you’re going to make those big fish dreams a reality, there’re some important choices to consider when rigging up your new fly-fishing outfit.
Spring fly fishing for brown trout.Setting Up Your Fly Reel and Line
If you purchase a Montana Casting Co. Fly Rod Outfit through our Outfit Builder, we will ask the following questions to ensure that we spool your reel correctly:
What hand do I reel with - left or right?
This impacts which direction the backing and fly line needs to be spooled onto the reel. It is also important to ensure that the drag system works appropriately for whichever hand you reel with.
When attaching your leader, what do you prefer?
- Attaching the loop on your leader directly to the welded loop on your fly line, or…
- Adding a butt section (a 2-foot length of monofilament) and then tying your leader to the butt section with a blood knot?
Setting Up Your Leader and Tippet
With backing and fly line on your new reel and your Outfit in hand, it’s time to decide how you’ll rig your leader. There are hundreds of variables involved in rigging your leader: the species you’re fishing for, the water conditions, temperature, what insects are hatching, and fishing style (nymphing, fishing dries, or stripping streamers) to name a few. The list can go on indefinitely, which is a big part of the allure of fly fishing—there’s always more to learn. For the sake of this blog article, we’ll try to keep things simple. You can (and will likely want to) modify these suggestions depending on the conditions you're fishing in.
Rigging up for nymphing with the Warm Springs fly rod.Fishing Dry Flies:
This is the easiest to rig but the most difficult to fish when trying to get the perfect presentation.
- We prefer a 9-foot monofilament (Mono) leader for fishing dries.
- Tie on 24 inches of the appropriate size Monofilament Tippet; Mono floats better than Fluorocarbon (Fluoro) and is less expensive.
- Pick your fly and tie it on with a Clinch Knot, put some floatant on the fly and start fishing.
Nymphing:
This rig is used to catch fish subsurface in rivers and lakes. In Montana, it’s common to use two flies—you’ll want to check the recommendations and regulations pertaining to the region you’re fishing in.
- Attach a 7.5-foot Mono leader to your fly line or butt section.
- Attach your strike indicator on the thicker end of the leader, closer to your line or butt section.
- Cut off approximately 18 inches of your new leader and tie on a tippet ring or micro swivel.
- Tie an 18-inch length of Fluoro tippet to the tippet ring or micro swivel. (Fluoro sinks and is virtually invisible underwater, making it perfect for nymphing.)
- Tie your first fly to the bottom of the Fluoro tippet.
- Tie a 24-inch length of Fluoro tippet to the bend of the hook of your first fly.
- Tie your second fly to the end of the new length of Fluoro tippet.
- Add some non-lead split shots to your leader to help it sink down to where the fish are. We like to put a B-size split shot above the tippet ring and another in between our flies. You may need to add or remove a split shot to get the depth correct. Our rule of thumb on freestone streams: the nymphs should bounce across the bottom or be very close to it.
Streamer Fishing:
This rig mimics a minnow or wounded bait fish. Often, this technique results in large fish crushing your fly. In other words, if you’re looking for big fish and only big fish, tie on a streamer.
- Shorten your leader to only 3 or 4 feet long.
- Tie on a heavy piece of Fluoro tippet, like 3X.
- Tie on your streamer and go fishing.
Conclusion
If you’re new to fly fishing, remember that part of the sport is expanding an ever-growing repertoire of skills. Even the best fly fishermen still have more to learn, so enjoy the process and don’t be afraid to trial and error your way to success. Those big fish daydreams are well within your reach.
Happy fishing!Still have questions? Drop them in the comments below or head over to our Contact Us page to reach out!
Rigging Your New Fly Rod & Reel
-
Blood knots—complicated or simple?
Whether you’re grabbing your 4 wt fly rod for a weekend in the mountains or preparing for a trip to the salt flats, the blood knot is a worthy tool in any fly fisherman’s arsenal. To the inexperienced, they might appear complicated—but they don’t need to be. We’ve pulled together some tips and tricks to make tying this useful fly fishing knot simple.
When should you use a blood knot?
A blood knot, or—as the old timers used to call it—a barrel knot, is the best way to connect two pieces of tippet. This is especially true if your two pieces of tippet already have a fly tied to one end or if you're splicing in some tippet to lengthen your leader.
How to tie a blood knot:
A blood knot is fairly straightforward to envision; all it consists of are two pieces of tippet being twisted around each other ten times, with the end of each piece of tippet running back through the middle of those twists.
The challenging part of a blood knot is getting the ends of the tippet back through the middle of the twists. So here’s a trick: start with an X. Beginning on one side of the X, take the free end of the tippet and twist it around the other tippet five times. Then, run the free end back through where the center of the ten twists will be (the side of the X that hasn’t been twisted yet). This will keep the middle of the twists open while you repeat the above steps on the other side of the X.
Since the first piece of tippet is already holding the middle of the twists open, you can run the second end of the tippet through the middle in the opposite direction of the first piece of tippet. Moisten the twists (this part is important to reduce friction when you are sinching down the knot), hold each end of the tippet, and pull; this will sinch everything down into a tight, barrel-shaped knot.
Clip off one of the ends and leave the other long enough to tie on a dropper fly. This method gives you more life-like action—which means more fish eating your flies.
At the end of the day, we find that a good visual (and lots of practice) are the best ways to familiarize yourself with a new knot. Check out the video below for a helpful step-by-step walk through from Montana Casting Co. CEO Scott Joyner… Then grab your fly fishing rod and hit the river to give it a try!
To view other educational videos and see our gear in action, visit our Montana Casting Co. YouTube Channel. And be sure to check out our Spring Sale!
Questions? Comments? Fly fishing stories? Share in the comment section below!Fly Fishing Knots: How to Tie a Blood Knot
-
Our fly line series so far...
If you’ve kept up with the previous two posts on fly lines, then you’ve slogged through a lot of information on fly line weight, taper, and general physics. Congratulations! You’ve graduated. I hope we’ve managed to beat back some of the mystery surrounding modern fly line specifications. At the very least, you’ve got a few facts in your back pocket to school your buddies with on the river.
If you haven’t kept up, no worries. Regardless of your familiarity with the Common Cents System (see Part 1) or the parts of a taper (see Part 2), Part 3 is meant to be a quick, user-friendly guide to Montana Casting Co. fly lines. Which line is best for you? Read on and find out.
The lowdown on Montana Casting Co. fly lines:
Montana Casting Company is rooted in the traditions of custom rod building. When we decided to expand from those roots, we decided to design our rods, reels, and fly lines in tandem so that each component could maximize the performance of the other. With a selection of three different fly lines in our store, you’re free to customize your line to fit your rod and the environment you plan to fish in.
Just to be clear, our fly rods can be used with any brand of fly line. If you have a tried-and-true brand that you fall back on, use it. Our rods will cast it with ease and accuracy. That said, we’ve put a considerable amount of thought into designing three fly lines that we believe will maximize the performance of your fly rod and we encourage you to give them a try. Here’s a simple rundown of what to look for when choosing a Montana Casting Co. fly line.
What do the names of MCCo. fly lines tell you?
You can choose between the MC-30, MC-38, and MC-40 fly line. Your first hint at the difference between these lines is in the name. MC-30, for instance, indicates that the tapered head of the fly line is in the first 30 feet. Additionally, there will be a number following the name of the general model to specify line weight; MC-306 refers to a 6 wt MC-30 line. As stated earlier, you’ll generally want to match the line weight to the weight of your fly rod.
When should I use the MC-30 fly line?
The tapered head of this fly line is in the first 30 feet, making this an aggressive weight-forward line. If your current fly rod is fast action and you're having trouble loading the rod, try this line; you’ll really feel the difference. This is also a great line for times when you’ll be consistently making short casts of 30 feet or less. It’s a blast to cast!
MC-30 Fly Line SpecificationsWhen should I use the MC-38 fly line?
The tapered head of this fly line is in the first 38 feet. That extra 8 ft adds 30 grain to your standard fly line and serves as a happy medium between more aggressive weight forward lines and lengthier tapers meant for long casts. This is a great line for your day-in and day-out fishing trips, and it will work in any condition. (It pairs especially well with the smooth, medium action of the Craig Fly Rod!)
MC-38 Fly Line SpecificationsWhen should I use the MC-40 fly line?
The tapered head of this fly line is in the first 40 feet. This line fits the AFFTA standards, meaning that it is a standard taper line. Though it works well in all conditions, this line is perfect for long casts with dries to a skittish hog brown or the like. Gentle presentations are key, and the MC-40 is the right fly line for the job.
MC-40 Fly Line SpecificationsGet out of the weeds and get fishing!
The question of which fly line is right for you can be a complicated one to answer. We’ve mercilessly dissected many fly lines over the years in the name of science… As a result, we’ve gotten our fly rods and fly lines to be exactly what we want them to be. That said, fly fishing is a sport of continuous learning and growth. So get out there, have fun, and experiment!
Have questions? Want to talk shop? We’re always happy to chat. Leave a comment below, send us an email at gethookedup@montanacastingco.com, or give us a call at 406-285-1452. Happy fishing!
Let’s Get into the Weeds: Fly Lines Part 3
-
Digging into Fly Line Taper
In Fly Lines Part 1, we looked at how a rod’s optimal line weight is determined using the Common Cents System as well as how additional factors (such as target species, weather conditions, and casting ability) might influence which line weight is right for you. This week’s post is all about taper. What is it? How does it vary across fly lines? Why do we care? Let’s jump back into the weeds!
What is taper?
In generic terms, taper refers to the shape of a fly line. Fly line shape (or diameter) usually varies throughout the length of the line. There are a few key components to a fly lines’ taper: the belly (where most of the mass is located), the front taper (the transition between the tip of the line and the belly), and the rear taper (the transition from the belly of the line to the running line). Varying the length and diameter of these different components allows for the creation of specialized fly lines.
Nowadays, there are several types of tapered fly lines, including weight-forward, double taper, shooting taper, and level line. Weight-forward fly lines are arguably the most popular, but we’ll also touch briefly on double taper lines.
What is a double taper fly line?
Double taper lines have a belly section that takes up most of the length of the fly line. The front and rear tapers are uniform in length and profile, and the middle of the taper is the exact center of the fly line. The idea behind this was to make your fly line last longer; once you wear out one side of the fly line, you can flip the line and use the back half just like a new fly line. Though they lack the direct power of weight forward lines, their longer, thinner tip section makes them ideal for delicate, dry fly presentations.
What is a weight forward fly line?
All Montana Casting Co. fly lines are designed with weight-forward tapers. As the name suggests, weight-forward lines are designed to carry most of the mass in the head of the line. A shorter, heavier belly pulls the comparatively light “running line” (or uniform, non-tapered section) forward. This makes it easier to shoot line over long distances, through windy conditions, or with a heavier, more air-resistant fly.
When you’re shopping around for a weight forward fly line, you’ll find differences in the lengths of the front and rear tapers as well as the belly sections. These factors influence the accuracy, presentation, line control, and the overall aggressiveness of the line. Choosing the right weight forward line is often a matter of determining what balance of these features is best for the conditions you’ll be fishing in.
For example, you might be fishing a fast-action fly rod on small rivers or creeks. You’re making short casts—30 feet or less. A shorter, more aggressive, weight-forward tapper will allow you to feel the rod load.
If you’re fishing a buttery-smooth, medium action and you’re float-tubing on a lake, you’ll want a longer tapered head to allow for longer casts and to help prevent your line from slapping the water behind you.
Or maybe you’re fishing with Montana Casting Co.’s “Old Blue” (the Warm Springs) and you’re looking to use it on everything from gurgling mountain creeks to big rivers and wide-open lakes. If you have a favorite rod, you’ll want to bring it everywhere—and that means you’ll want a medium taper line that can handle a variety of situations.
How can you tell what the tapper of the fly line you're looking at is?
Most modern fly lines have specifications online or on the packaging that inform you how long the tapper is and the weight in grains of the first 30 feet of the fly line (minus the level line). You might also see abbreviations (such as WF for weight forward lines) that tell you more about the lines. Here’s an example of what you will find on the packaging of a Montana Casting Co. fly line:
The final post in our three-part series on fly lines will cover Montana Casting Co. fly lines. We’ll talk design process, key differences, and how to decide which MCCo. line is right for your upcoming fly fishing adventures.
Disclaimer: Yes, we’ve mercilessly dissected and weighed many fly lines over the years to get our fly rods and fly lines to be exactly what we want them to be. I know it's terrible, but it was done in the name of science!
We’d love to answer any of your fly fishing related questions! Leave a comment below, send us an email at gethookedup@montanacastingco.com, or give us a call at 406-285-1452. Happy fishing!
Let’s Get Into the Weeds: Fly Lines Part 2
-
Rigging Your New Fly Fishing Rod & Reel
The big day is here; you finally have your new dream fly rod and reel in hand. The excitement is almost too much to handle! You're daydreaming about the river, campfires, sharing stories with friends, and, of course, fish—BIG FISH. If you’re going to make those big fish dreams a reality, there’re some important choices to consider when rigging up your new fly-fishing outfit.
Spring fly fishing for brown trout.Setting Up Your Fly Reel and Line
If you purchase a Montana Casting Co. Fly Rod Outfit through our Outfit Builder, we will ask the following questions to ensure that we spool your reel correctly:
What hand do I reel with - left or right?
This impacts which direction the backing and fly line needs to be spooled onto the reel. It is also important to ensure that the drag system works appropriately for whichever hand you reel with.
When attaching your leader, what do you prefer?
- Attaching the loop on your leader directly to the welded loop on your fly line, or…
- Adding a butt section (a 2-foot length of monofilament) and then tying your leader to the butt section with a blood knot?
Setting Up Your Leader and Tippet
With backing and fly line on your new reel and your Outfit in hand, it’s time to decide how you’ll rig your leader. There are hundreds of variables involved in rigging your leader: the species you’re fishing for, the water conditions, temperature, what insects are hatching, and fishing style (nymphing, fishing dries, or stripping streamers) to name a few. The list can go on indefinitely, which is a big part of the allure of fly fishing—there’s always more to learn. For the sake of this blog article, we’ll try to keep things simple. You can (and will likely want to) modify these suggestions depending on the conditions you're fishing in.
Rigging up for nymphing with the Warm Springs fly rod.Fishing Dry Flies:
This is the easiest to rig but the most difficult to fish when trying to get the perfect presentation.
- We prefer a 9-foot monofilament (Mono) leader for fishing dries.
- Tie on 24 inches of the appropriate size Monofilament Tippet; Mono floats better than Fluorocarbon (Fluoro) and is less expensive.
- Pick your fly and tie it on with a Clinch Knot, put some floatant on the fly and start fishing.
Nymphing:
This rig is used to catch fish subsurface in rivers and lakes. In Montana, it’s common to use two flies—you’ll want to check the recommendations and regulations pertaining to the region you’re fishing in.
- Attach a 7.5-foot Mono leader to your fly line or butt section.
- Attach your strike indicator on the thicker end of the leader, closer to your line or butt section.
- Cut off approximately 18 inches of your new leader and tie on a tippet ring or micro swivel.
- Tie an 18-inch length of Fluoro tippet to the tippet ring or micro swivel. (Fluoro sinks and is virtually invisible underwater, making it perfect for nymphing.)
- Tie your first fly to the bottom of the Fluoro tippet.
- Tie a 24-inch length of Fluoro tippet to the bend of the hook of your first fly.
- Tie your second fly to the end of the new length of Fluoro tippet.
- Add some non-lead split shots to your leader to help it sink down to where the fish are. We like to put a B-size split shot above the tippet ring and another in between our flies. You may need to add or remove a split shot to get the depth correct. Our rule of thumb on freestone streams: the nymphs should bounce across the bottom or be very close to it.
Streamer Fishing:
This rig mimics a minnow or wounded bait fish. Often, this technique results in large fish crushing your fly. In other words, if you’re looking for big fish and only big fish, tie on a streamer.
- Shorten your leader to only 3 or 4 feet long.
- Tie on a heavy piece of Fluoro tippet, like 3X.
- Tie on your streamer and go fishing.
Conclusion
If you’re new to fly fishing, remember that part of the sport is expanding an ever-growing repertoire of skills. Even the best fly fishermen still have more to learn, so enjoy the process and don’t be afraid to trial and error your way to success. Those big fish daydreams are well within your reach.
Happy fishing!Still have questions? Drop them in the comments below or head over to our Contact Us page to reach out!
Rigging Your New Fly Rod & Reel
-
Fly Fisherman Magazine is featuring Montana Casting Co. and our Warm Springs Fly Rod in its April-May 2024 Issue!
Fly Fisherman loves gear with a story behind it, and Montana Casting Co. has that in spades. The article highlights our strengths as a home-grown, family-owned fly rod company as well as the heartfelt story of loss and healing that brought company founders Scott and Cat Joyner to where they are today.
Fly Fisherman called special attention to the Warm Springs fly rod. After testing it on a Pennsylvania spring creek, they referenced the “gritty” capabilities of the Warm Springs, deeming it ready for “almost anywhere you can find blue-collar trout, from big rivers to small streams in the mountains.”
The Warm Springs Fly Rod is our flagship fly rod. Designed by Scott Joyner in its entirety—from blank to guide placements, right down to the reel seat components—it balances performance with durability in one classy fish-wrangling package. Visit the Warm Springs product page to learn more about these performance fly rods.
You can sign up for a Fly Fisherman Magazine subscription to read the article online or look for the April-May 2024 issue in stores now!
We’re celebrating this milestone with 15% off all of our fly rods. Looking to pair your new rod with a fly fishing reel? We’ll give you 15% off the entire outfit when you use our Outfit Builder.
Fly Fisherman Magazine is Featuring Montana Casting Co.
Comments
Steve |
April 04, 2024The Fam and I were just discussing this a couple of days ago. It’s great how well you explained it and put it in such easy terms to understand.